
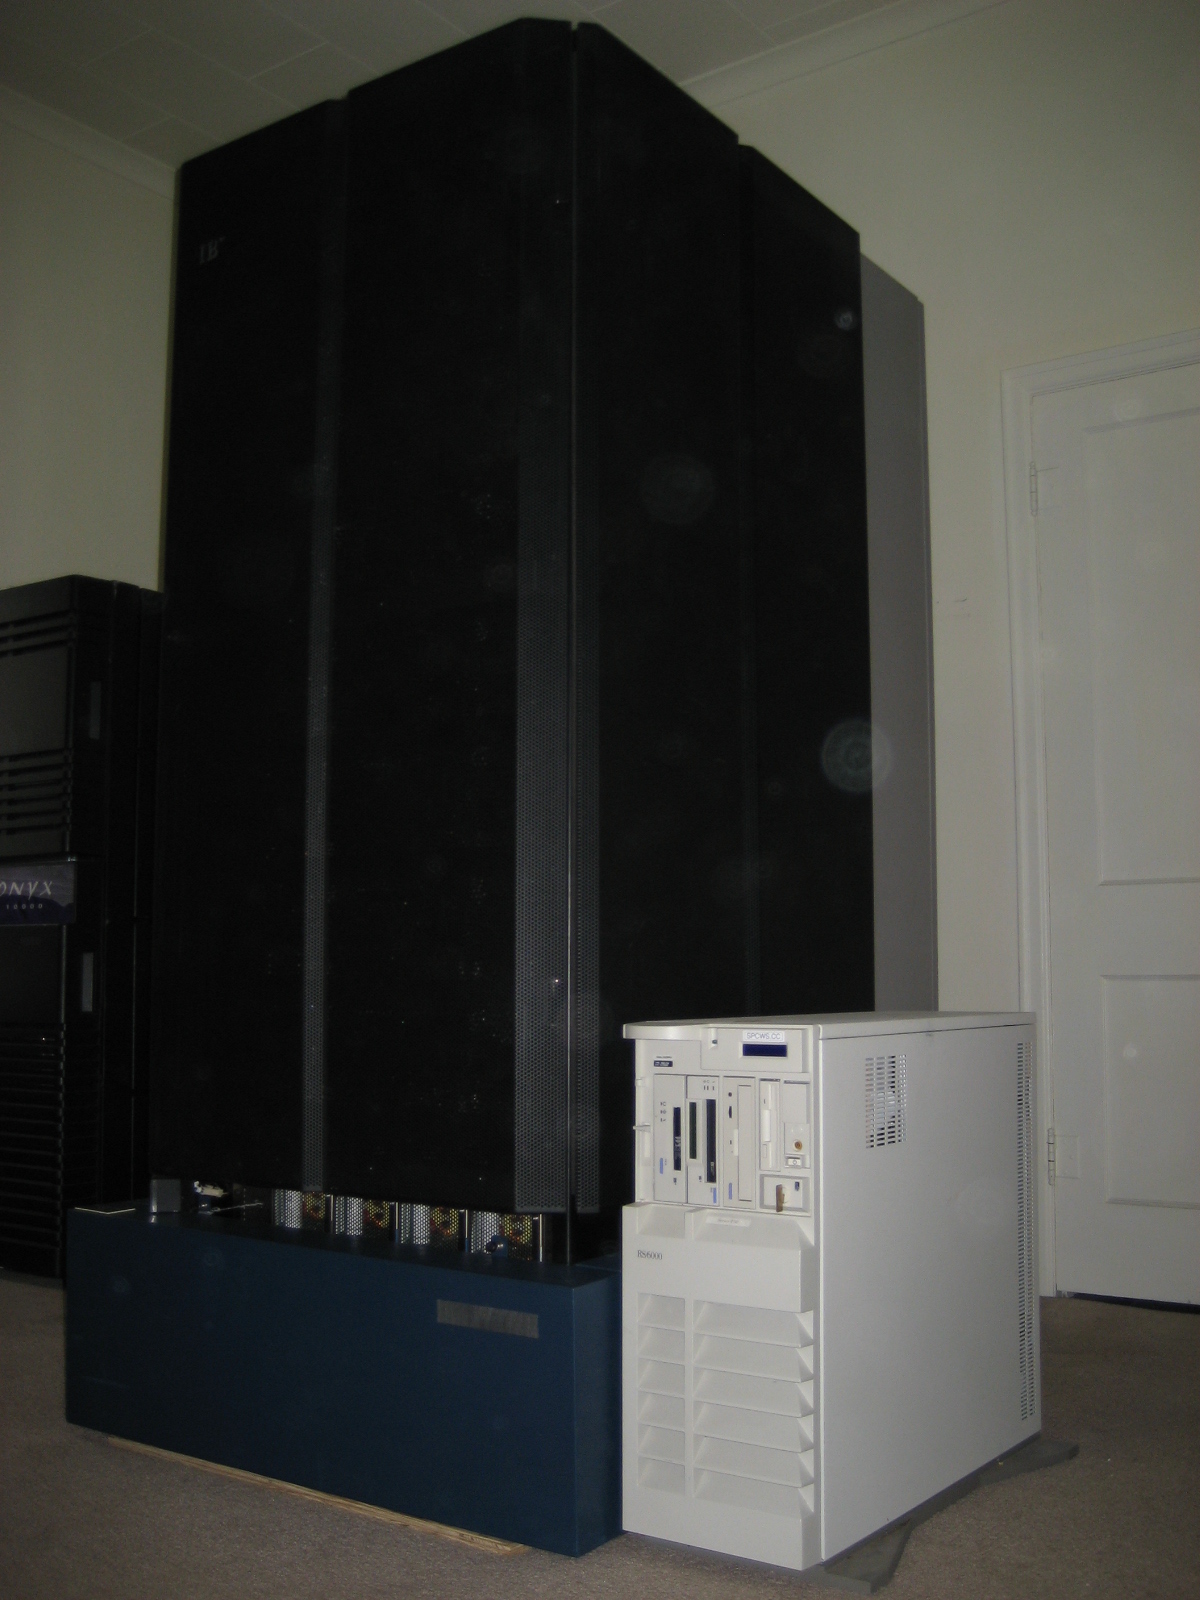


You may recognise the IBM SP design as 'Deep Blue', the supercomputer IBM put together to beat chess masters - and, finally, Garry Kasparov in 1996. Theirs was a little bigger than mine (two racks, 30 nodes, custom hardware) - but this SP is quite a bit newer, and has faster processors.
The Scalable POWERparallel is a supercomputer built upon several nodes which are
interconnected by a high-speed switch of IBM's own design. Each node (there were
15 different node types available, by the end of the SP run) is powered by
1, 2, 4 or 8 processors, each from the POWER family. In my case each node has
16 POWER3 Thin nodes, containing four 375mHz POWER3-II processors, for a grand total
64 processors.
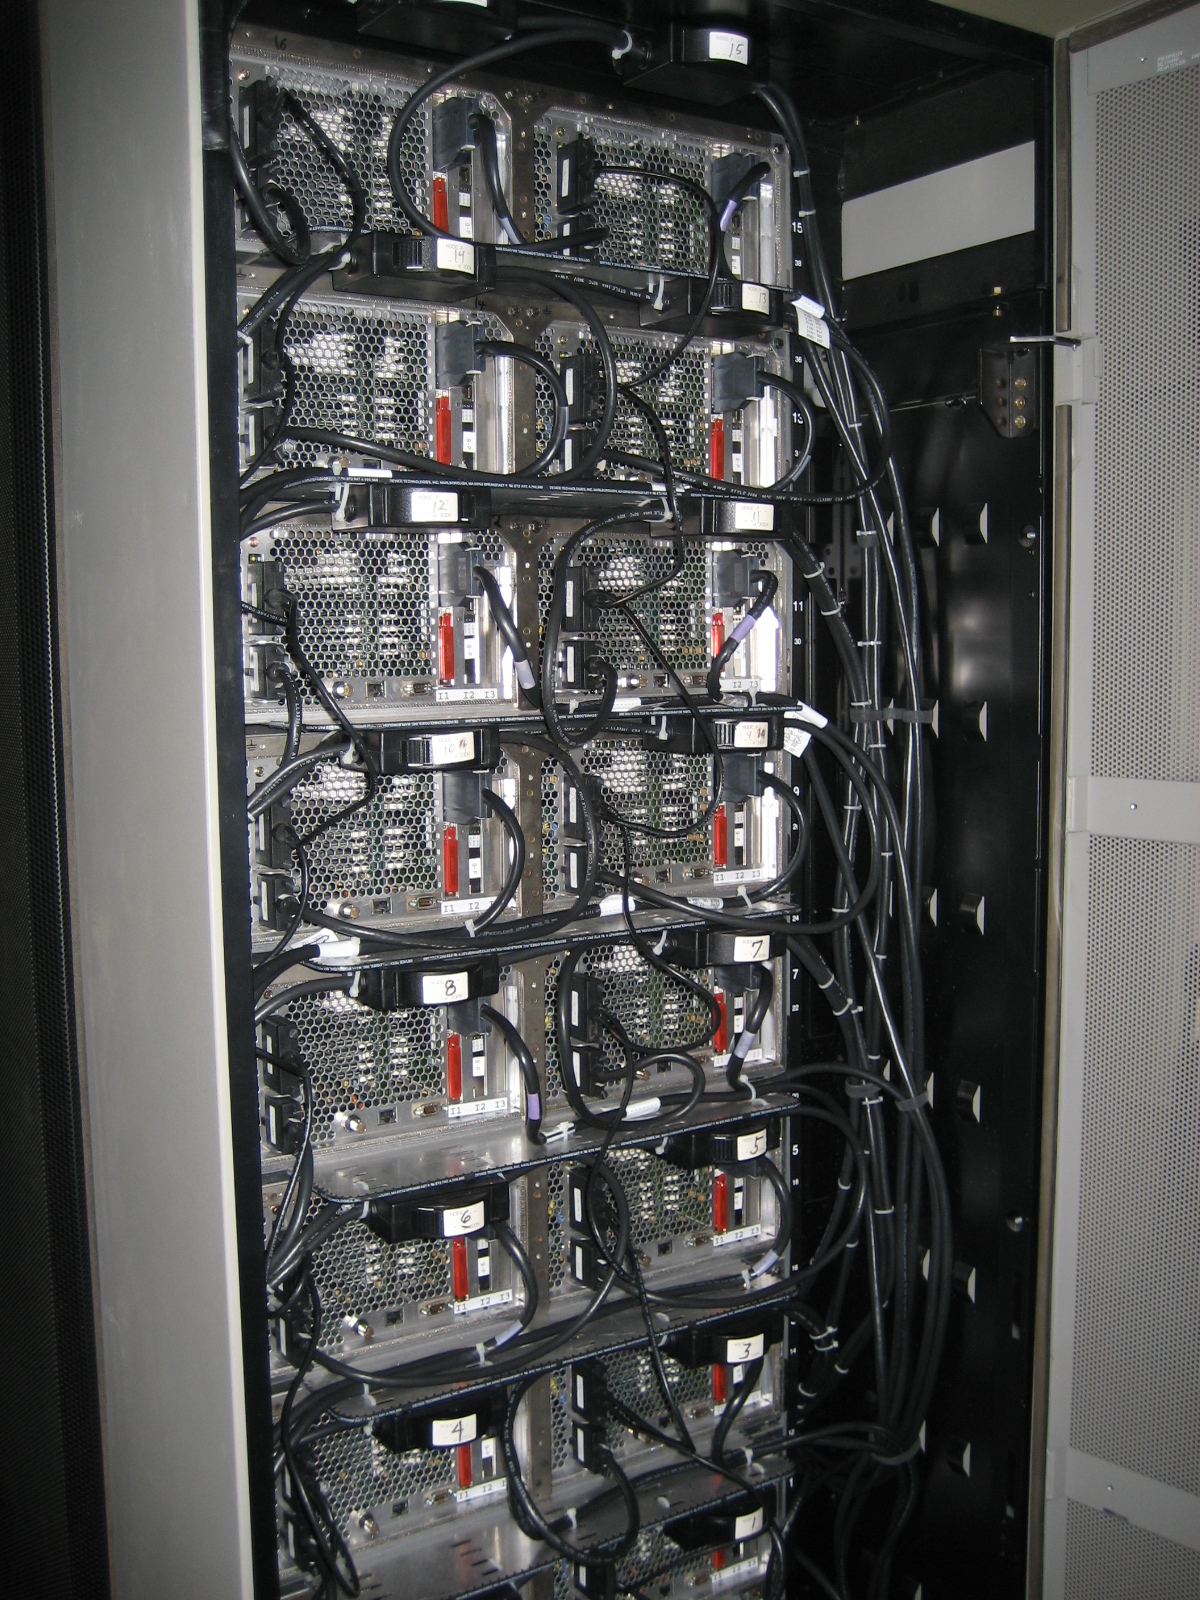
Nodes are paired, side by side, on shelves in the SP frame (what IBM names its rack). There
are half-height racks (8 nodes), full racks (14 nodes) or extended racks (16 nodes), which
have another shelf added onto their tops.
Each node has its own power supply, drawing from the +48VDC system voltage, and two SCSI
disks. Behind the power supply is the CPU box itself, which features a compact mainboard,
several VRMs, slots for processor boards (in my case, two boards with two processors)
and memory boards (two boards, presumably interleaving memory). There is also a management
board in its own special slot, and two 64b PCI slots.
At the bottom of the rack is the high speed switch, in mine the 32 port SP Switch2, which uses a proprietary connector
that looks an awful lot like a SCSI2 connector. Below this is the frame power supplies, which take line voltage in
(either single or three phase) and produce 112 Amps (per PSU) of +48VDC. There are up to four power supplies, which
logically means one of the four much be a spare (3-phase can only power three supplies at once, one per phase).

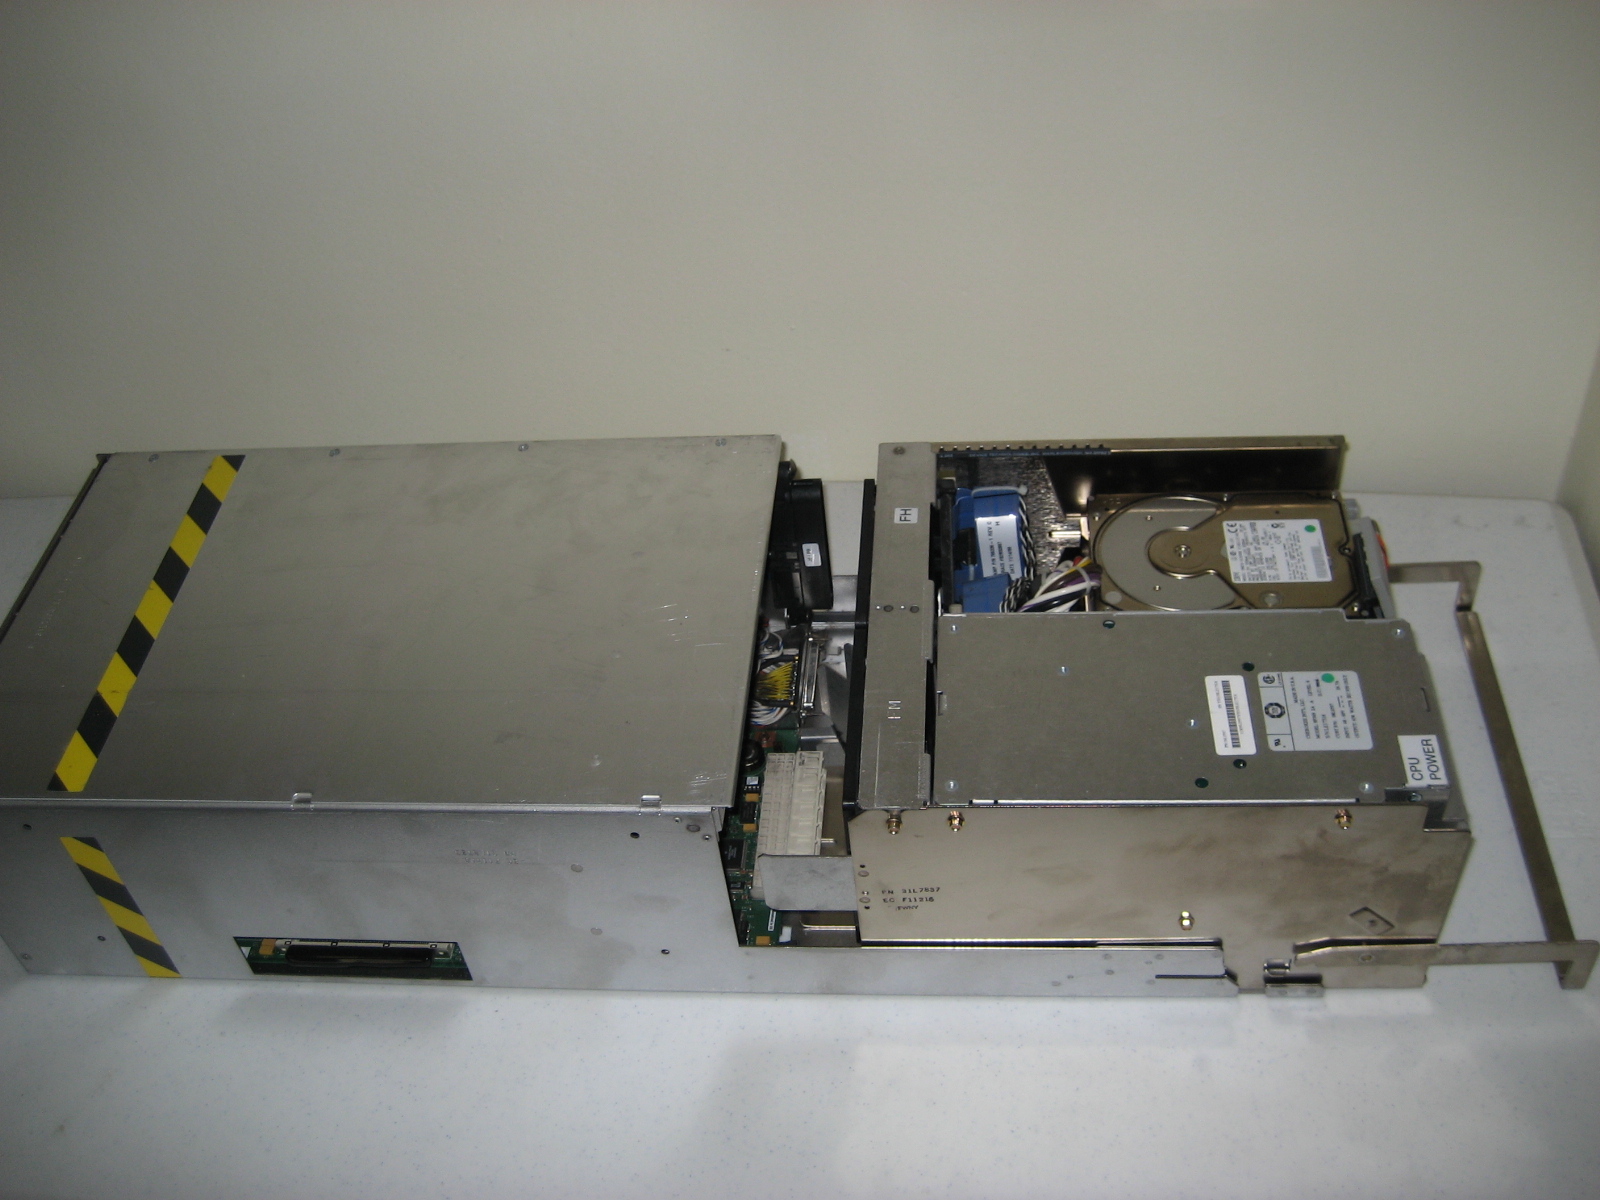


Each node has four 375mHz Power3-II processors and can stack up to 4GB of RAM. Each Power3-II processor has 64KB of L1 cache, 8MB of L2 cache, two floating-point units and two fixed-point units. Theoretical peak per processor is 1500MFLOPS.
I have made a walk-around video of the SP,
First off, the side skirts (the blue covers around the base) come off by lifting up on
them and peeling them away from the rack. Next remove the front and rear doors, by using
an Allen key to 'unlock' them, and then, after opening them most of the way, lifting up to
release them from their pin-in-hole hinges.
The side skins are removed by first taking off the beige rear skins (12" wide or so). These
have two bolts at the top, and then running up the inside of the rear rack upright. You will
need a deep well socket (5/16") to get onto these and be able to turn them out. Once you've
undone these, the rear side panel should come away. This leaves the black mesh side skin,
which has two bolts below it. Once these are removed it will lift up and away.
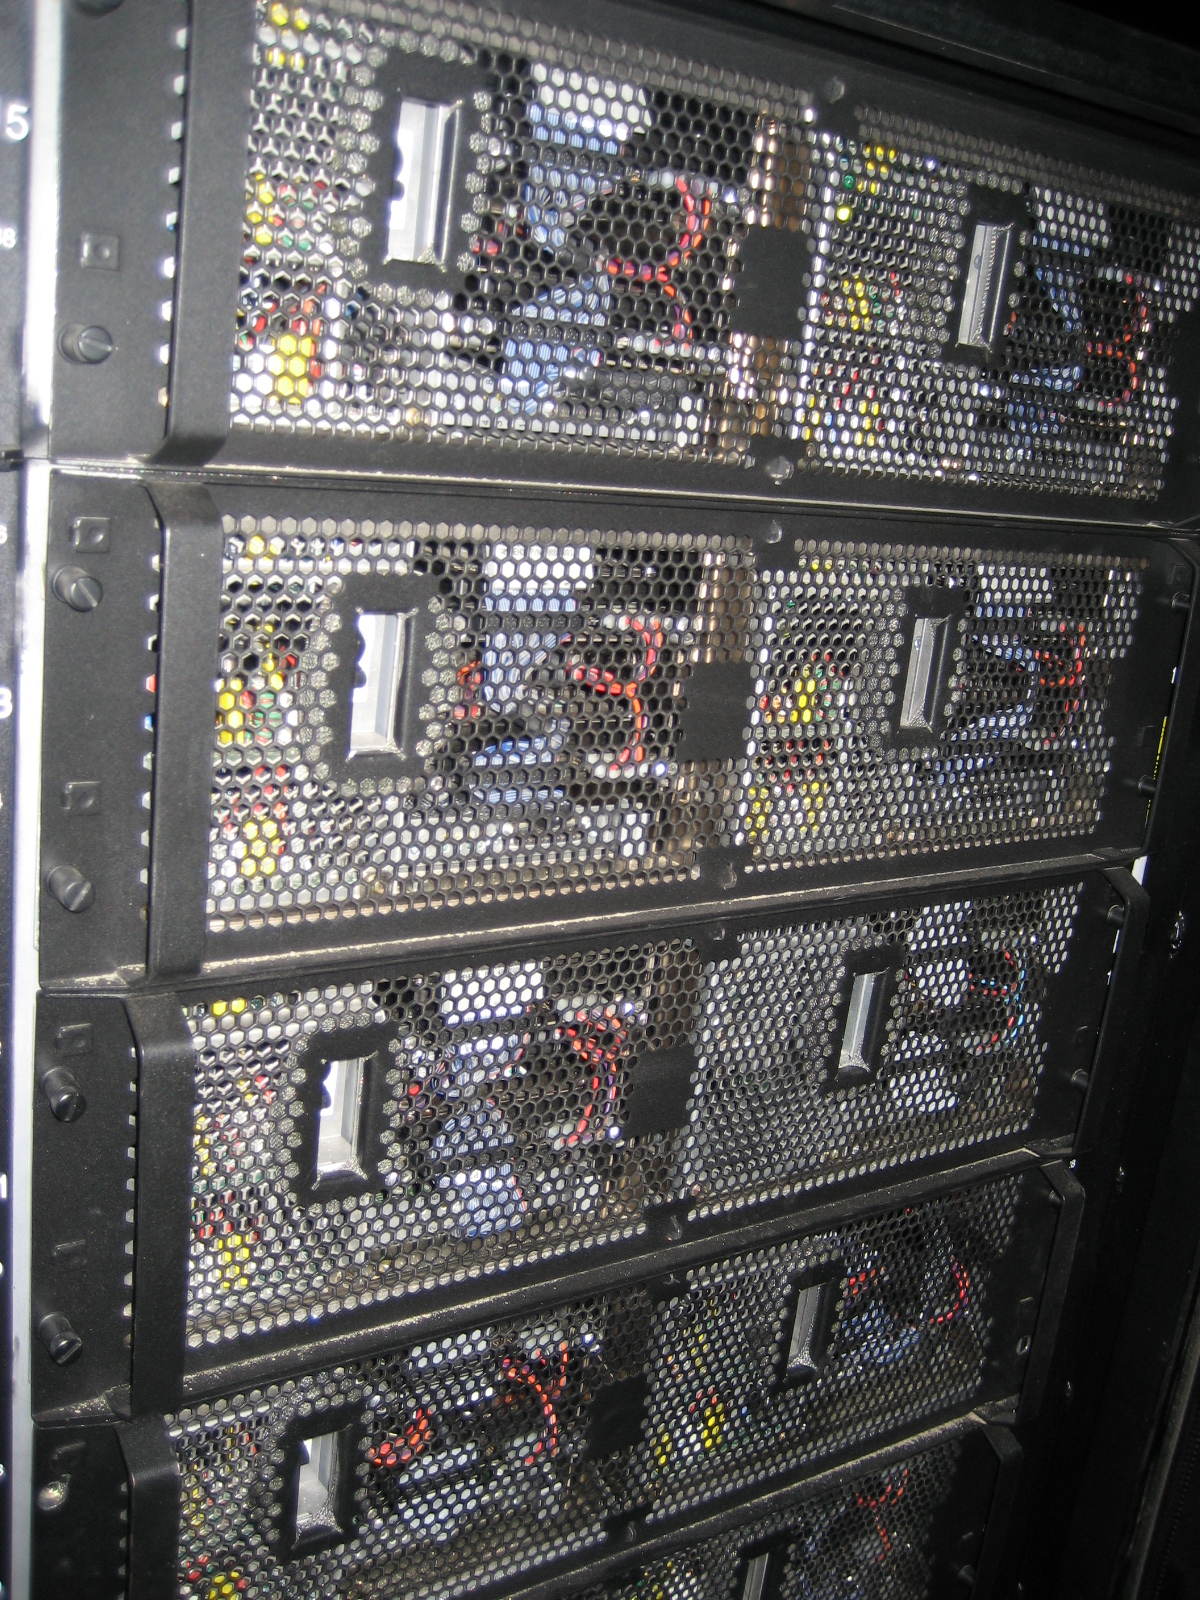


Now for the nodes. The front covers for each shelf are held on by four thumscrews in each
corner. Simply undo and then, holding the handles, firmly pull away from the rack.
Each node is held in by three bolts, two at the rear (at each corner, at the top, of
the node in its shelf) and one in the front, it's just inside the power pack, in the centre
at the bottom. Once these three are removed, the units will come out. First pull down
the release handle (it pulls top-to-bottom), and then slide the PSU/disk section out
of the shelf - they weigh around 30lbs, so be prepared for the weight! The PSU/disk section
slides out from the CPU section, they are separate units. The CPU sections have a base
plate that runs forward of them which the PSU/disk section sits on, so pull on this and
it will slide out towards you. When it's just about to drop out of the rack you'll see
some striped yellow and black tape appear on the casing, remarkably helpful - thanks IBM.
The CPU sections are approximately 40lbs, so again, be prepared for the weight.
Next pull the line power supplies at the bottom, each has two big thumb screws. If they're
wound on tight, use an allen key to loosen and then zip it out with your fingers. They're
spring mounted, and don't come all the way off, but when they're completely unthreaded
they'll pop out a ways. Each PSU is a good 40lbs or so, and the full depth of the
rack.
So now you've taken many hundreds of pounds of weight off the rack, and you'll note it's
still heavier than sin. Not only do we have the shelves and cabling to go, but to keep
the frame stable when sliding out nodes, the rack is weighted at the bottom. There are
five roughly 2'x2' plates, each weighing 35-40lbs underneath the rack. If you have the
ability, tipping the rack over would help - but given how heavy it still is, you could
easily crush yourself, or someone else, unless there's a lot of you. I cheated and
undid them with the rack upright, tempting fate and a crushed hand. The plates are held
on by threaded rods which are fixed to the rack, each with a 1/2" nut. Reach under
the rack and undo the to diagonally opposed nuts, which'll leave the plates held by
the two remaining opposed nuts. Then slide several 2x4's under there to catch the plates
and stop them smashing your hand. I had managed to lose my 1/2" socket and needed to
do it with a spanner, which made me seriously nervous without those extra few inches
of clearance my longer socket ratchet would've afforded - just in case. Whatever you've
got with 1/2" on one end and the longest handle is what you should use. Now gently undo
the remaining nuts. The plates will creak as they slide over each other before the nuts
pop off and they clatter down onto the 2x4's. Hopefully you've still got fingers. Roll
the rack forward on its casters and the plates should be sitting in a stack on the
2x4's.


Congratulations, you've just shed another 240-odd pounds of weight. Next come the shelves
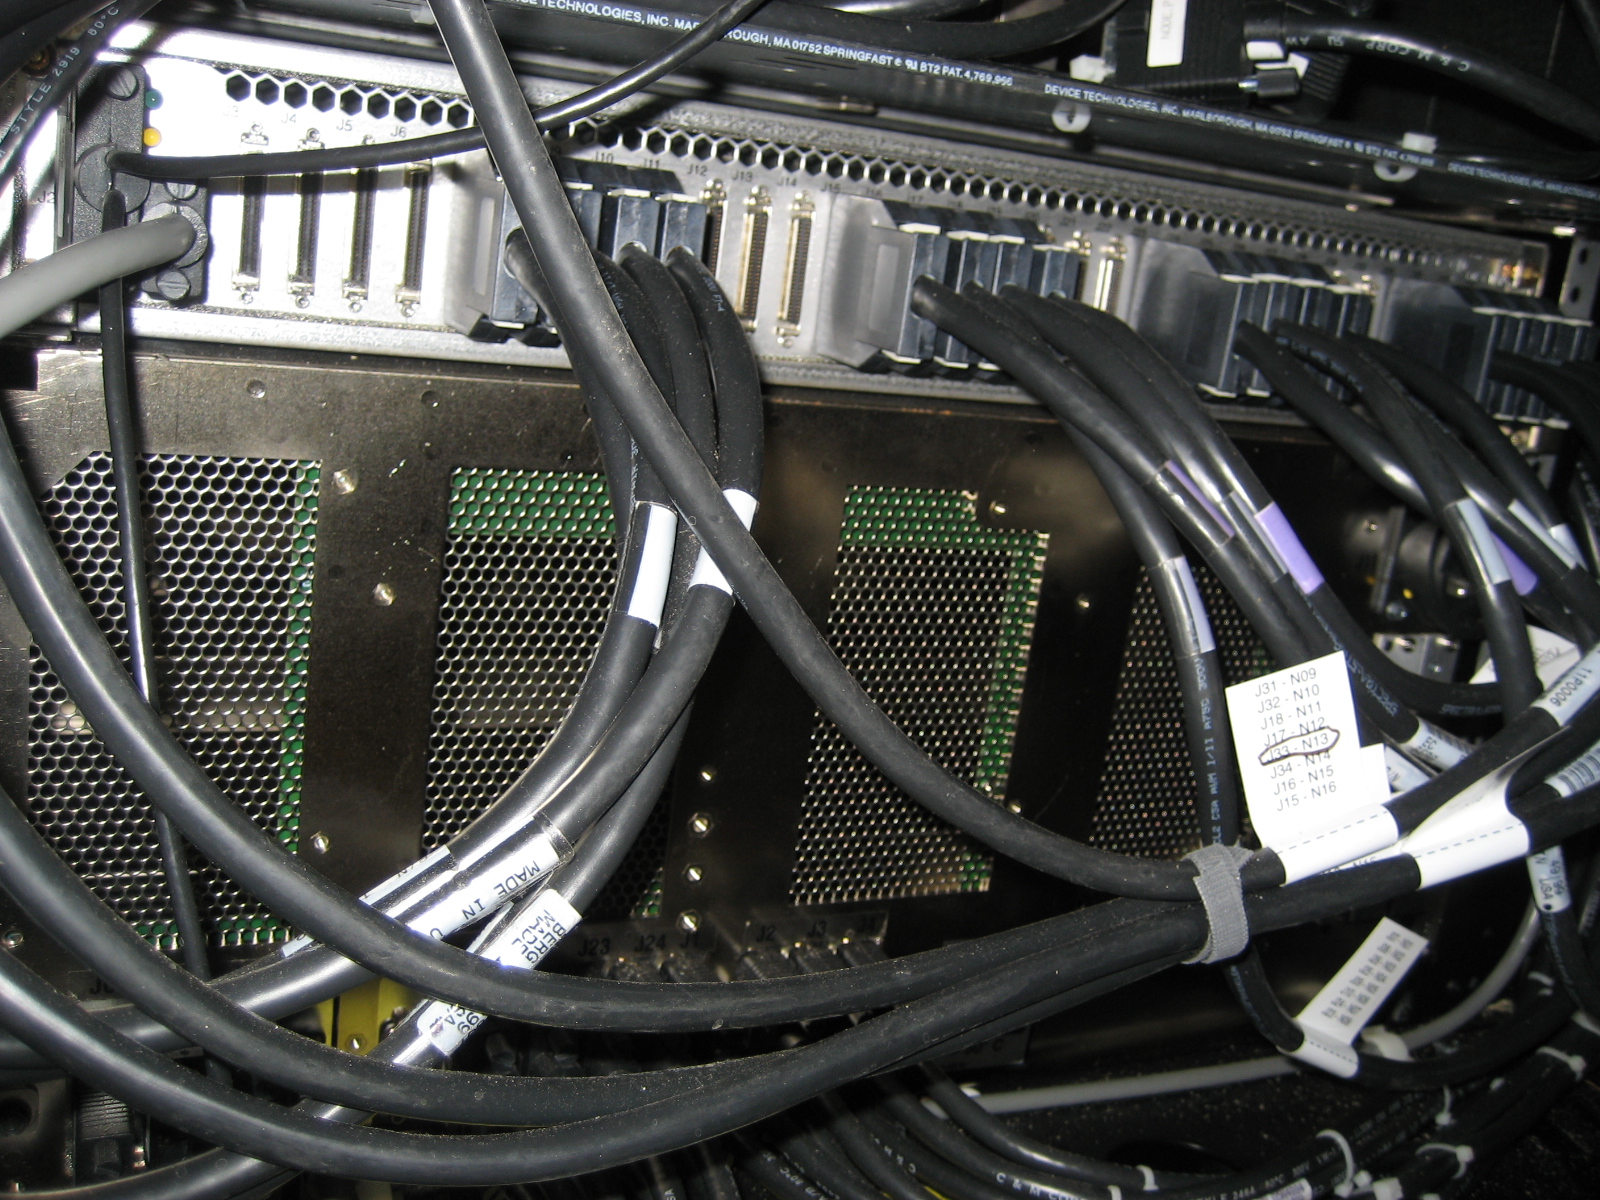
themselves. My rack has its cables beautifully organised with zipties, but unfortunately
they're ziptied to little plates behind each shelf (for the purpose of cable tieing). This
means you need to take all the cables off to removed the shelves. Time to go get your
labelled and mark each end of the cable with appropriate information - Node number at
the top, and Jack number at the switch/power distribution bars at the bottom. Now may be
a good time to take LOTS of photos to help crib your memory, just in case.
Once you've labelled everything and are pretty sure you can get it back the way it
came, clip all the zipties, undo all the DB plugs connecting to the switch/power bars and
remove. The front main on/off switch is held on by two 5/16" bolts. Once removed you'll need
to undo the grounding strap, which is held on by a 7mm nut. You can then unplug the switch
housing from cable that runs back through the side of the rack and finally plugs into the
power bar using a DB9.
The shelves are fixed to the rack by two tiny little screws, one in each corner to
the rear of the shelf, in its bottom. Undo these using a 7/32" socket. This will release the
shelf from the rear ears, which can remain bolted to the rack frame. You can
now slide the shelves forward and out of the rack.
Last comes the high speed switch itself, which is held in by two thumb screws at the front
of the rack. As with the line PSUs, undo with allen key to loosen, then run the rest of
the way with your fingers. The switch will then come out, forwards.
If you have an extended rack, as I do, the top of the rack, where the upper most shelf sat,
can be removed - this will garner another 80lbs or so of weight reduction. Four large nuts
at each corner hold this on. Simply undo and lift away.
Congratulations, you now have the rack as light as can be made. Which, of course, still
weighs an awful lot, due to its sturdy construction - it is designed to hold 1600lbs of
gear, after all!
And, as they say in the Haynes manuals, reassembly is made by reversing these instructions.
Good luck!